How to build a Multi-Store?
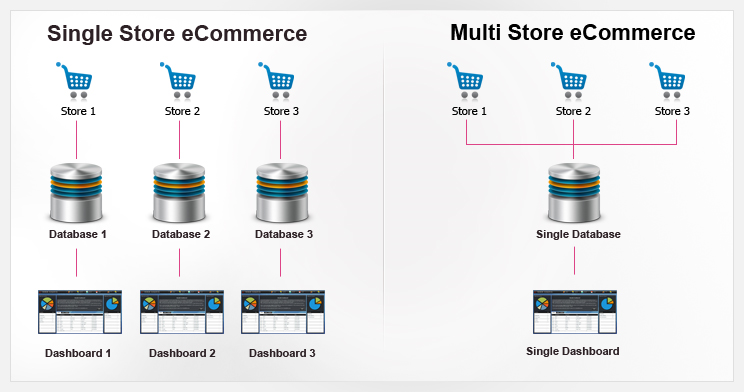
Arastta allows for multi-store management using only one installation. With Multi-Store, you can launch hundreds of online stores using a single integrated system. You can create unique online stores for multiple brands, product sets, B2B, B2C, affiliates, franchises, employee stores, co-branded stores and more. You can also quickly launch micro-stores for promotional campaigns. Best of all, every online store shares a single database.
Stores can be shown as a sub-domain (store2.mydomain.com) or another domain (my2domain.com).
Subdomain store
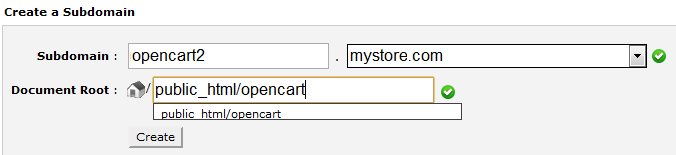
You can login to the cPanel of their default store to create a subdomain. You should create a new folder for the subdomain, under Subdomain. In the root directory, link the subdomain to the path where the default store was installed to. For example, if the default store had been installed under "public_html/arastta", the new subdomain (arastta2) should be created under "public_html/arastta". We could add more subdomains here to create our multi-store by following this procedure.
When we visit our new subdomain in our browser, the default store is visible. To customize the new store at this subdomain we need to visit the admin panel for our multi-store.
Another domain store
The process is same as for the subdomain, with the difference that you should go to the Addon Domains page of cPanel instead of Subdomains.
New store in Settings
The admin panel of the new store can be visited through either store sites, at "arastta.mystore.com/admin" or "arastta2.mystore.com/admin". Just add a "/admin" to either of your stores' locations to access the admin panel. There is only one admin panel that controls all the stores in your multi-store.
To create a new store in the administration, visit System > Settings and press Insert. Adding a store requires information to be filled from the General, Local, Design, Option, Mail, SEO, Cache, Security, Fraud and Server tabs. In these sections you can add a new template, logo, currency, language, and layout. After pressing "Save", you will see that the default store is replaced by the new store in that subdomain's store front.
Customizing the store front
Products, product categories, customers, page layouts, and more, can be edited in the administration and customized for each store. You can individually select which products are available for each store in the Links tab when editing or creating a product. Checking the stores in this section makes the product only available in those specific stores. When adding or modifying a product category, you can select which stores display the category in the Data tab. Customer and order info will be automatically sorted into their appropriate store in the administration side when they create an account or buy a product at that store.